Seven Day Roguelike 2020
This year I decided to join the Seven Day Roguelike (7DRL) game jam. It’s a week long event where participants spend time creating new roguelike games, individually or as a team. Games in this genre vary greatly but generally have the following elements:
- Permadeath - players are unable to respawn after death, they must start the game from scratch
- Procedural content - levels, enemies, and items are unique within each play of the game
- Turn based - gameplay is turn based, encouraging tactics over reflexes
- Simple graphics - usually ASCII or tile based
Some popular traditional roguelike games are NetHack, Angband, ADOM, and (of course) Rogue. Some newer games include DCSS, Brogue, and Cogmind.
I had never participated in a game jam and had very little experience with game development. This challenge gave me the opportunity to learn more about game development, roguelikes, and even a fun new algorithm. While I made less progress than I anticipated, it was an enriching experience and has introduced me to a new potential hobby.
Getting Started With Godot
When I tried to get into game development in the past I had used Phaser, but scarcely accomplished more than the tutorials. Since I was hoping to use this jam as another introduction to game development, I decided to choose a more fully featured game engine that would give me the ability to make all sorts of games once I invested the time into learning it.
Godot is a free and open source game engine that allows you to create both 2d and 3d games. Although not as polished, it at least seems similar to the big players like Unity and Unreal Engine. It was also appealing to me that it was open source since I try to use free software as much as possible for my personal projects. There are a range of roguelike-specific game libraries (rot.js, libtcod) that are often recommended for the game jam, but again, I wanted to learn something a little more general purpose than that.
I was pleased to find a really nice set of tutorials were available on their website. These range from informational articles on specific topics to a step-by-step tutorial where you make a full game from scratch. I found that while they didn’t use anything similar to a roguelike to demonstrate these concepts, they covered a wide enough range of material that I was much more prepared by the time I had finished them.
Game development with Godot is centered around creating “scenes” that are made up of trees of nodes that have different properties. These scenes can define specific entities like the player or enemies, as well as something more abstract like a map or level in the game. Generally these are then composed into a game via “instancing”. For example, if you were to define a Player scene you might start with a node called Area2D at the root which is used for 2d collision and physics. Then you would add children like a Sprite node for the characters image and a CollisionShape2D to define how it collides with other objects.
Player (Area2D)
  |---Sprite
  |---CollisionShape2D
An instance of this scene could then be added to a separate top-level scene that defines the game itself, which may have other nodes like the map and the heads-up display.
Main (Node)
  |---Player
  |---Map
  |---HUD
You can also instance scenes programatically. You would use that strategy for things that may be defined dynamically like enemies that spawn at different intervals.
Godot allows you to attach scripts to any node in a scene. These scripts basically define a class that extends whatever the type of the node is. They come with a variety of methods you can override related to the game loop such as _init, _ready, and _process. The documentation suggests you write your scripts using a language called GDScript which was created for the engine itself, but you can also use C# or C++. I decided to use GDScript because of its tight integration with the tooling even though I am more experienced with C#.
Communication between different nodes is done using an event system that Godot calls “signals”. There are predefined signals that nodes emit such as Area2D’s area_entered and area_exited but developers can also define their own signals to emit and handle.
With these basic building blocks we should be able to construct our entire game.
Entering the Labyrinth of the Lich
After spending a day going through Godot tutorials, it was time to get started on the game. I had given a little thought to what I wanted to create and had landed on a vague premise involving a spaceship taken over by alien lifeforms where the player would need to navigate their way to the escape pods in order to survive. This idea hit a roadblock when I failed to find any free sets of sci-fi sprites I could use for the game art. I’m definitely not an artist and I did not want to be slowed down even further by choosing to make my own art. Since most roguelikes are set in a fantasy world, there was a lot of art I could use if I chose that setting.
The new game (which I would later title “Labyrinth of the Lich”) would center around a wizard who must find his way through a series of mazes while encountering various enemies in a search for forbidden knowledge. The plan was to have a few levels of procedurally generated mazes with different types of enemies. This would culminate in a boss fight of some sort once the exit of last level ws reached. The player character would be limited in how many spells they could “know” at a time. Their starting spells would either be chosen at the beginning of the game or be randomly selected and then they could find additional spells to replace these within the game. These spells would be mix of offensive, defensive, and utility spells such as a fire AoE spell, a warding spell that splinters to damage attacking enemies, and invisibility.
I knew my plans were ambitious for someone with no experience but they gave me a set of concepts to focus on. Much of what I would end up spending my time on would be the general gameplay mechanics of roguelikes rather than the specifics of my game.
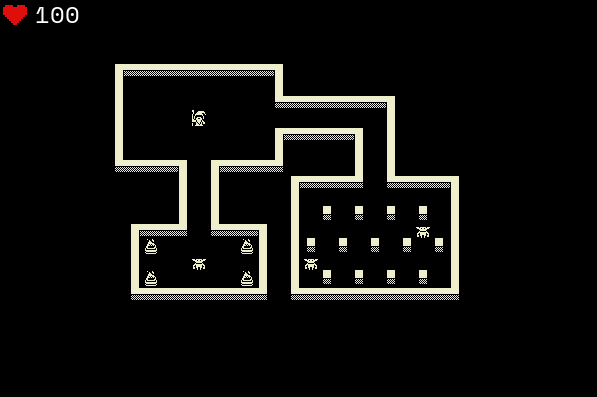
Time to Jam
The first thing I had to tackle was the creation of the map and the tiles that it is made up of. Eventually, I would want to procedurally generate these levels, but while trying to nail down the basic mechanics I just created a static set of rooms. I used Quale’s Scroll O’ Sprites for all of the game’s art. Since it is provided as a regular image file I had to use GIMP to crop out the sprites I needed in order to make a tileset. Then, within Godot I was able to create a Tilemap node that uses that tileset. A Tilemap is a node that allows you to define a set of tiles and easily “paint” them onto the screen in order to build the map. It also lets you easily define collision shapes for each of the tiles. I began by making the wall’s collision shapes match the entire space of the tile, but later would shrink this down in order to make line-of-sight more realistic.
Next I created a Player node that could be instanced onto this map. I implemented traditional eight direction movement using a tutorial from KidsCanCode. The technique outlined in that tutorial involves responding to directional input and then using a Raycast2D node to test whether there would be a collision in that direction. If there is not, move the character, otherwise do nothing.
Once I got that working I began tackling spell targeting. In most roguelikes, ranged attacks like spells will use some sort of selector to choose your target. The selector will often auto-target nearby enemies to make it easier to use, but in my case I relied on manual movement.
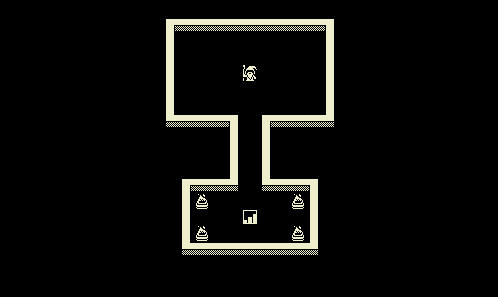
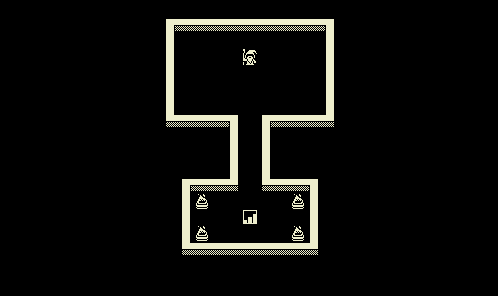
To get this working I had to create a new Target scene as an Area2D with the “X” as a Sprite, a CollisionShape2D, and a Raycast2D. I originally had a timer that caused the flashing behavior you see above, but later ditched that as it was hard to see where the target was at times. I hid the target by default, and then when the player pressed “Z” to cast their spell it would appear. The same raycast-based movement is implemented here in order to prevent the target from going through walls. Once the player has moved to their target and pressed “Enter”, the current position is sent back to the Player node using a signal.
From there I needed to make the spell casting actually do something. I decided the first spell I would implement would be a simple, single tile fire spell. This involved creating a simple scene that could be instanced when the spell is cast. In order to cause damage, I used groups. Groups are a simple way to share behaviors across sets of nodes. In this case, I added each entity that collided with the fire into a condition:burning group. Then, on each turn, I was able to get each entity that was marked as burning and apply damage to them.
Now that I could move around and cast spells, the next challenge was going to be adding actual enemies that could see and pursue the player. For that, I found another KidsCanCode tutorial that explained visibility and targeting using an example game with automated turrets. There are two parts to this: detecting when the player is within range and determining if the enemy can see the player. The first half is implemented by giving the enemy an additional Area2D with a circular collision shape as wide as their visibility range. If the player enters that circle, the enemy will attempt to target them. To determine if the enemy can see the player, we can use raycasts again.
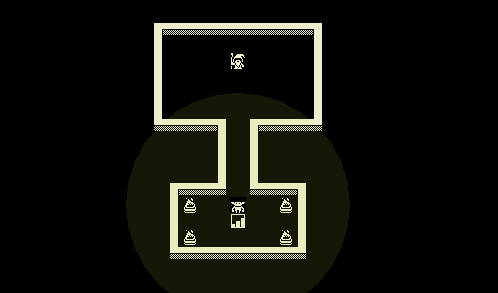
You’ll notice that there are actually four separate rays. This is a trick that the tutorial gives to increase the accuracy of these line of sight tests. If you used a single ray to the center of the player, the game would consider them not visible when they are standing around the edge of a corner, even though logically the enemy could see them.
It was also at this point that I adopted a new raycasting technique that the tutorial mentioned. Instead of giving each entity a Raycast2D node (or multiple), it is more performant to get direct access to the 2d world state where you can perform as many casts from point A to B as you want.
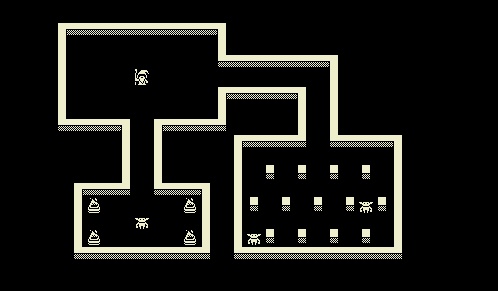
So at this point we had enemies that know when they see the player, but have no way to actually pursue them. For this I had to implement a custom A* pathfinding algorithm. I had heard of A* before, but had never implemented it myself so this part ended up being really fun for me. For an in-depth explanation of the algorithm you can read through the blog post that I used to implement my version. The general idea is that you expand outward from the starting tile, generating a cost for each neighboring tile, until you reach your target. It is more efficient than Breadth First Search or Dijkstra’s since it will prioritize its expansion based on some heuristic function. The simplest heuristic (and the one I used) is the Manhattan Distance from the current tile to the target. In most cases this is going to get you the most efficient path rather quickly.

When an enemy sees the player it will calculate the best path to reach them. If they later lose sight of the player it will remember this path and move to the end of it, either regaining visibility of the player and calculating a new path, or stopping its movement.
I also added melee combat at this point. If the player or enemy try to move and collide with something that belongs to the opposite group, they will cause damage.
It’s almost starting to look like a game!
The last major change I made was to spell targeting. It’s not exactly fair if the player’s spells have infinite range and can be cast through obstacles. In order to remedy this I implemented a similar system to how enemies handle visibility and targeting. The spell target was given a circular area as its range and kept track of whether or not the player was within that circle. It also used raycasting to check whether it had line of sight back to the player. If both of those conditions were met, the spell could be cast. Otherwise, the cursor would turn red.

By the time I finished that it was about 11 pm of the last night of the jam. My very last additions were some improvements to the HUD. I added a heart sprite with a counter for the player’s health and implemented a simple combat log that displays messages such as when the player receives/causes damage, when enemies see the player, etc.
If you’re interested, you can play a web version of the game on my itch.io page.
Next Steps
Although it’s not quite a full roguelike yet, it has the skeleton of one. I’m planning to hopefully complete the game over time since there are still more things I’d like to learn how to implement.
In order to finish it I’ll need to add the following things:
- Fog of war so the player can only see their immediate surroundings (and not through walls)
- Procedural level generation
- A mana/energy system for spell casting
- Procedural enemies and items
- More spells/conditions
- A final boss
The one I’m most excited about is the level generation. I’m looking forward to learning some new algorithms related to maze generation.
Overall, I’m satisfied with the progress I was able to make during the game jam and I’m excited to see some of the other games that were completed. I had a lot of fun and hope that this is the beginning of a satisfying hobby of making games.